Making a Cheap Macro Lens
Macro photography is close-up photography. The lens is typically optimized to focus sharply on a small area and magnifying...


Making a cheap Bounce Card
Yet again some cool diy to bounce light from a DSLR flash! As everyone knows, it's actually better not to flash light...


Actually its really simple and fast.
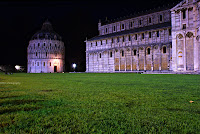
1) Open Photoshop and your "postcard" suited picture. I choosed that one taken by me in Piazza dei Miracoli in Pisa, Italy:

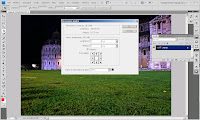
2) Go to Image -> Canvas Size or just press Ctrl+Alt+C and a new window will appear:

3) Insert Height and Width values as you prefer (usually same values for both and in pixel, they depends on the resolution of the picture you're framing) and on the bottom right you can choose the color by clicking on the little square.
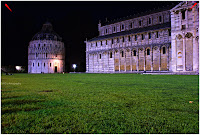
Actually this will add a line around all of your picture by the values you inserted and the color you choosed. My values are H:1 W:1 Color:White

4) Let's re-do the second and third step; Go to Image -> Canvas Size or just press Ctrl+Alt+C and the canvas window will appear.
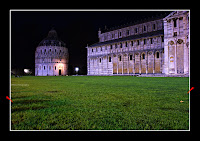
This time my values are H:15 W:15 Color:Black
As you can see, that step will add you a bigger line than the one before (this time we used H:15 W:15) that will be our frame around the picture giving to it a postcard mood!

Hope you liked. As usual, please share.
This time i will explain how to build a free and easy Flash Diffuser.
As everyone knows, flashing directly to the subject will cause it to be "whitened" and so, we will have a great loss in details.
That's why we need to bounce the flash light on a reflective surface (white if possible) as discussed in my previous post "Making a cheap Bounce Card"
Actually you stop here and can go buy a Flash Diffuser from eBay or photography shops, or you can read furthemore!
Ingredients:
- an opaque can of Liquid Soap/Detergent
- a can of Pringles

2) Cut the bottom of the liquid soap/detergent can so that some cm of the closed bottom will actually go out from the pringles can in the final flash diffuser.
Actually the pringles can should fit almost every external flash unit!
Ingredients:
- an empty white opaque film can
Just cut a little stripe of the film can just to let your internal flash fit inside it.
Here how it should look like and how it will fit the internal flash unit of your dslr
Those are the one i made:
As everytime, if you liked it, please share it!
Macro photography is close-up photography. The lens is typically optimized to focus sharply on a small area and magnifying it.
Depth of field is extremely small when focusing on close objects; a small aperture (high f-number) is often required to ensure sufficient depth of field. This requires either a slow shutter speed or bright lighting for correct exposure; in all but the brightest natural lighting if a prolonged exposure is not advisable, auxiliary lighting (such as from a flash unit) is required as a ring flash or a flash diffuser like the one discussed here on DIY photography.
How to:
- Using a lens specifically designed for close work and with a long barrel for close focusing, called a macro lens.
- Extending the distance between the lens and the film or sensor by inserting either extension tubes
- Placing an auxiliary close-up lens in front of the camera's taking lens. Inexpensive screw-in or slip-on attachments provide close focusing at very low cost
- Reversing the lens using a "reversing ring"
You can buy a reverse ring, or you can fit your second lens (if you have one) on the lens you have on your body camera as i did and have macro capabilities for FREE:
That’s my sony a300 with the standard lens dt18-70 and my old manual Zenit lens: Mc Helios 44m-7
I just reversed the Helios lens and attached to the DT lens
That’s all!
Don’t forget to switch to Manual focus!
This is an example of what i did with that DIY:
Other infos:
- Here is another cheap way to have an homemade macro lens at Photocritic
- And here another usueful way to build your own reversing ring from a Body Cap, its basically the same way i did macro reversing, but instead of using 2 lens, you will use a body cap, a filter and some glue!
- Another really cheap way of doing macro from Zuco
So, actually there are some cool website to do that like http://tiltshiftmaker.com/ or http://labs.artandmobile.com/tiltshift/ and you can have last one for your iPhone too!
But we want to make things difficult (not that much anyway ;p) and make it from scratch!
1) Open you Photoshop or Gimp application
2) Choose and open a photo you think it will fit for miniaturizing itself. I choosed my shot from Umeda Sky Building, Osaka (Japan). Actually really old shot and not in a high resolution.
4) Now,we are going to select which part of the picture will be blurred. To have a smooth effect for the blur, we can choose the gradient tool (pressing G) and then click on the fourth icon along before the Mode drop-down (see picture for details)
5) With the gradient tool on, we draw a vertical line starting from the center of what we want to remain in focus and as long as how much in focus we want. And it will be painted in red (actually it just a mask, so we didn't paint anything!)

I used 50, 0, 0, 35, 254, 0 and here is the result:
9) Let's try to have a more Plastic look by saturate colors by going Image -> Adjustments -> Hue/Saturation and boost the Edit:Master Saturation=from +20 to +50, i did +50


