First of all, what is an Holga camera!
Well,if you are reading how to create an Holga effect, you probably know it. But i will do some wiki and explain.
Well,if you are reading how to create an Holga effect, you probably know it. But i will do some wiki and explain.
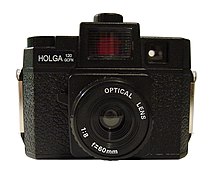
The Holga is an inexpensive, medium format 120 film toy camera, made in China, appreciated for its low-fidelity aesthetic.
The Holga's cheap construction and simple meniscus lens often yields pictures that display vignetting, blur, light leaks, and other distortions. The camera's quality problems have become a virtue among some photographers, with Holga photos winning awards and competitions in art and news photography.
from Wikipedia
So the main features are:
- Vignette
- Vintage/Acid color
- Good Contrast in the center of the picture
- Blur on the edge of the picture
some picture taken with the holga can be viewed here on Flickr
You can buy a cheap Holga on Ebay
Here we go with our Photoshop Tutorial
1) First of all, let's open an image we like. That's mine, a shot taken in Asakusa

2) We are now going to create a vignette. Go to Filter -> Distort -> Lens Correction and create the vignette by giving -100 in Amount under Vignette and choose Midpoint by the one that fit best your tastes.
I did Amount=-100 and Midpoint=+80 and here is the result:

I did Amount=-100 and Midpoint=+80 and here is the result:

3) Now we are going to recreate some Acid/Vintage color by going on Layers and adding a new Curves Layer by pressing this button:


4) To let the colors look like Acidified and Vintage we have to draw an S in the curve layers it just appeared like that:


Press CTRL+SHIFT+E to merge layers.
5) OPTIONAL This step will saturate colors a bit but it could omitted. If you want to do so you can go Image-> Adjustments -> Tone/Saturation and add saturation. I did Saturation=+20


6) Let's add some contrast by giving an unsharp mask to the luminosity channel of the picture.
First we have to go to Image-> Mode -> Lab Color and then in the Layer|Channel|Trace we click on Channel as that:

First we have to go to Image-> Mode -> Lab Color and then in the Layer|Channel|Trace we click on Channel as that:

Click on Luminosity and the picture will be displayed in Greyscale
7) Then add the unsharp mask to the Luminosity channel by clicking on Filter -> Sharpen -> Unsharp Mask and add values as 20|20|0 (you just have to move the first two option as you prefer). I did 20|20|0 and that's it:

8) Let's go back to RGB color by clicking on Image-> Mode -> RGB and we are almost done:

9) OPTIONAL, we can add a 10% to 20% transparent Black layer over the picture to obtain a more flat image:

10) That's the final result i had in a few minutes!

We can even add some Blur on the edge by using the same way explained in my Tilt-Shift Tutorial
Hope you enjoied it, and if so, SHARE it!!


Comments
0 Response to 'How to: Lomo Holga Effect'
Posta un commento